How is a range hood attached to wall?
Introduction
Range hoods are essential appliances in kitchen spaces as they help remove smoke, odors, and airborne grease particles during cooking. Proper installation of a range hood is crucial to ensure its effectiveness and safety. In this step-by-step guide, we will explore the process of attaching a range hood to the wall. By detailing the necessary tools, materials, and procedures, we aim to provide a comprehensive understanding of the installation process.
How is a range hood attached to wall?
I. Tools and Materials
-
Tools:
- Screwdriver or drill
- Measuring tape
- Pencil or marker
- Level
- Stud finder
- Step ladder
- Adjustable wrench (if necessary)
- Wire cutters (if necessary)
-
Materials:
- Range hood mount
- Screws and wall anchors
- Ductwork (if applicable)
- Vent cap (if applicable)
- Wire nuts and electrical tape (if applicable)
- Duct tape (if applicable)

II. Pre-Installation Preparation
-
Read the Manufacturer’s Instructions:
- Before beginning the installation process, thoroughly read and familiarize yourself with the range hood’s manufacturer instructions. Each model may have specific requirements and guidelines that must be followed for safe and proper installation.
-
Choose the Installation Location:
- Determine the ideal location for the range hood. Consider the distance between the cooktop and the range hood, ensuring that the hood covers the cooking area adequately. Additionally, choose a location with an accessible electrical outlet and proper ventilation opportunities.
III. Locating and Preparing the Mounting Area
-
Find Studs:
- Use a stud finder to locate the wall studs in the desired installation area. Mark the position of the studs with a pencil or marker.
-
Measure and Mark:
- Measure and mark the desired height for the range hood on the wall. Ensure that the range hood will be installed at a height that allows for sufficient clearance above the cooktop. Use a level to create a horizontal guideline for accurate installation.
IV. Mounting the Range Hood
-
Position the Mounting Template:
- Many range hoods come with a mounting template that helps with proper placement. Align the template with the marked installation height and trace its outline on the wall.
-
Pre-Drill Holes:
- Using the appropriate drill bit, pre-drill pilot holes at the marked locations on the wall. The size of the drill bit should match the diameter of the screws that will be used to secure the range hood mount.
-
Attach the Mounting Bracket:
- Place the mounting bracket onto the wall, aligning it with the pre-drilled holes. Secure the bracket to the wall by driving screws through the holes into the wall studs. Ensure the bracket is level and firmly attached.
-
Connect the Ductwork (if applicable):
- If the range hood requires ductwork for proper ventilation, attach the appropriate duct sections to the range hood and secure them with duct tape or clamps. Ensure that the ductwork follows a straight path with minimal bends or obstructions, allowing for efficient venting.
-
Secure the Range Hood:
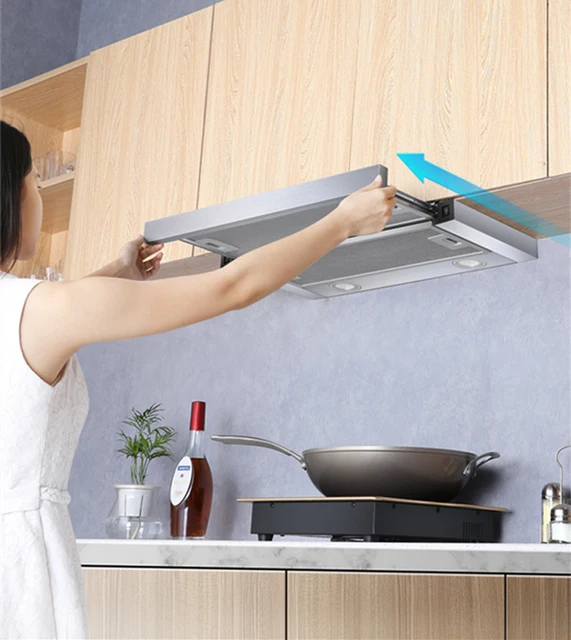
- Lift the range hood and align it with the mounting bracket or screws on the wall. Ensure the range hood is level and flush against the wall. With the help of a partner, hold the range hood in place while securing it tightly to the mounting bracket using screws provided by the manufacturer.
V. Electrical Connection (if applicable)
-
Shut Off Power:
- Locate the circuit breaker that controls the electrical outlet intended for the range hood. Turn off the power to the circuit to ensure safety during the electrical connection process.
-
Wire Connection:
- Follow the manufacturer’s instructions for electrical connections. Strip the outer sheathing of the electrical wires and connect the corresponding wires from the range hood to the electrical supply wires using wire nuts. Secure the wire connection with electrical tape for added protection.
-
Mount the Range Hood:
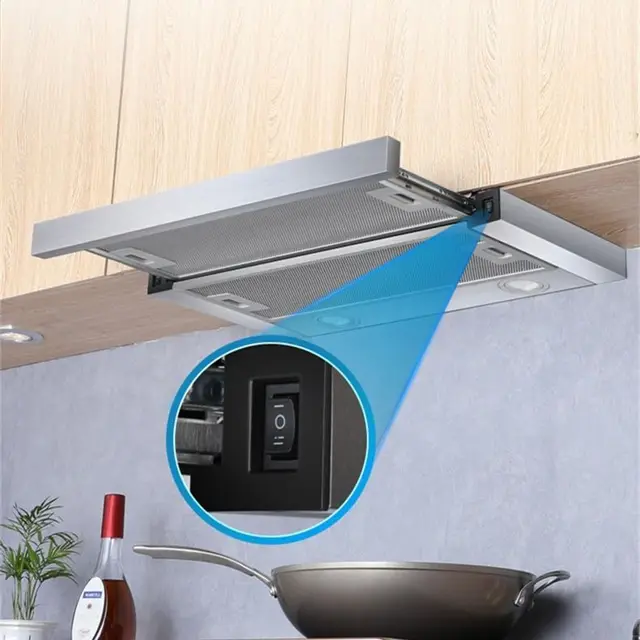
- Once the electrical connection is complete, carefully slide the range hood onto the mounting bracket or screws. Ensure it is securely in place and level before tightening any additional screws or fasteners.
VI. Final Adjustments and Testing
-
Check for Level:
- Use the level to confirm that the range hood is straight and level. Make any necessary adjustments to ensure proper alignment.
-
Test Functionality:
- Restore power to the electrical outlet and test the range hood’s functionality. Turn on the exhaust fan and check for proper airflow. Test the range hood’s lighting features if applicable.
VII. Post-Installation Clean-Up
-
Clean and Secure Ductwork:
- If applicable, clean the ductwork to remove any dust or debris that may have accumulated during the installation. Secure any loose sections of ductwork using clamps or duct tape to ensure proper airflow.
-
Remove Packaging and Debris:
- Dispose of any packaging materials and clean up any debris generated during the installation process. Ensure the installation area is clean and free of obstructions.

IX. Seeking Professional Assistance
-
When to Seek Professional Help:
- If you are unsure about any aspect of the installation process or encounter obstacles such as complex electrical wiring or the need for extensive modifications, it is advisable to seek the assistance of a professional installer. They have the necessary expertise and tools to handle any challenges that may arise.
-
Hiring a Professional Installer:
- Research reputable installation professionals who specialize in range hood installations. Seek referrals from friends, family, or hardware stores, and request quotes from multiple installers to compare prices and services. Make sure the professional is licensed, insured, and has experience with range hood installations.
-
Collaborating with the Installer:
- If you decide to hire a professional, communicate your expectations and requirements clearly. Discuss any specific installation preferences or concerns you may have to ensure that the installation aligns with your needs and preferences.
X. Ongoing Maintenance and Care
-
Regular Cleaning:
- To maintain optimal performance, clean the range hood regularly according to the manufacturer’s instructions. This includes removing and cleaning the grease filters, wiping down the exterior surfaces, and inspecting the ductwork for any blockages or buildup.
-
Replace Filters:
- Over time, the grease filters in your range hood will accumulate grease and debris, reducing their effectiveness. Follow the manufacturer’s recommendations for filter replacement intervals to maintain proper airflow and filtration.
VIII. Conclusion: Proper Installation for Optimal Performance
Attaching a range hood to the wall requires careful preparation, coordination, and attention to detail. By following the steps outlined above, you can ensure a safe and effective installation of your range hood. Remember to consult the manufacturer’s instructions for specific guidance related to your range hood model and seek professional assistance if necessary. A properly installed range hood will provide efficient ventilation, enhance kitchen safety, and contribute to a more pleasant cooking experience.


